FREE TRIAL included
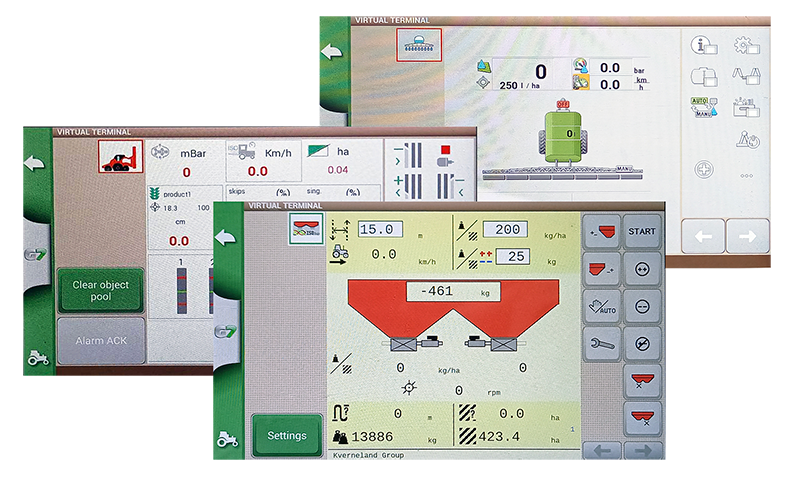
Experience the benefits of ISOBUS connectivity!
You can test all the advantages of the Virtual Terminal and Task Controller on your G7 / G12 before buying the VT / Full Lifetime Software License, thanks to the FREE trial period included.
After the FREE TRIAL, it is possible to purchase and activate a lifetime license.
There are two ISOBUS lifeme licenses available: VT and Full (VT + TC).
You can purchase a VT / Full lifetime license
from your trusted FARMNAVIGATOR reseller
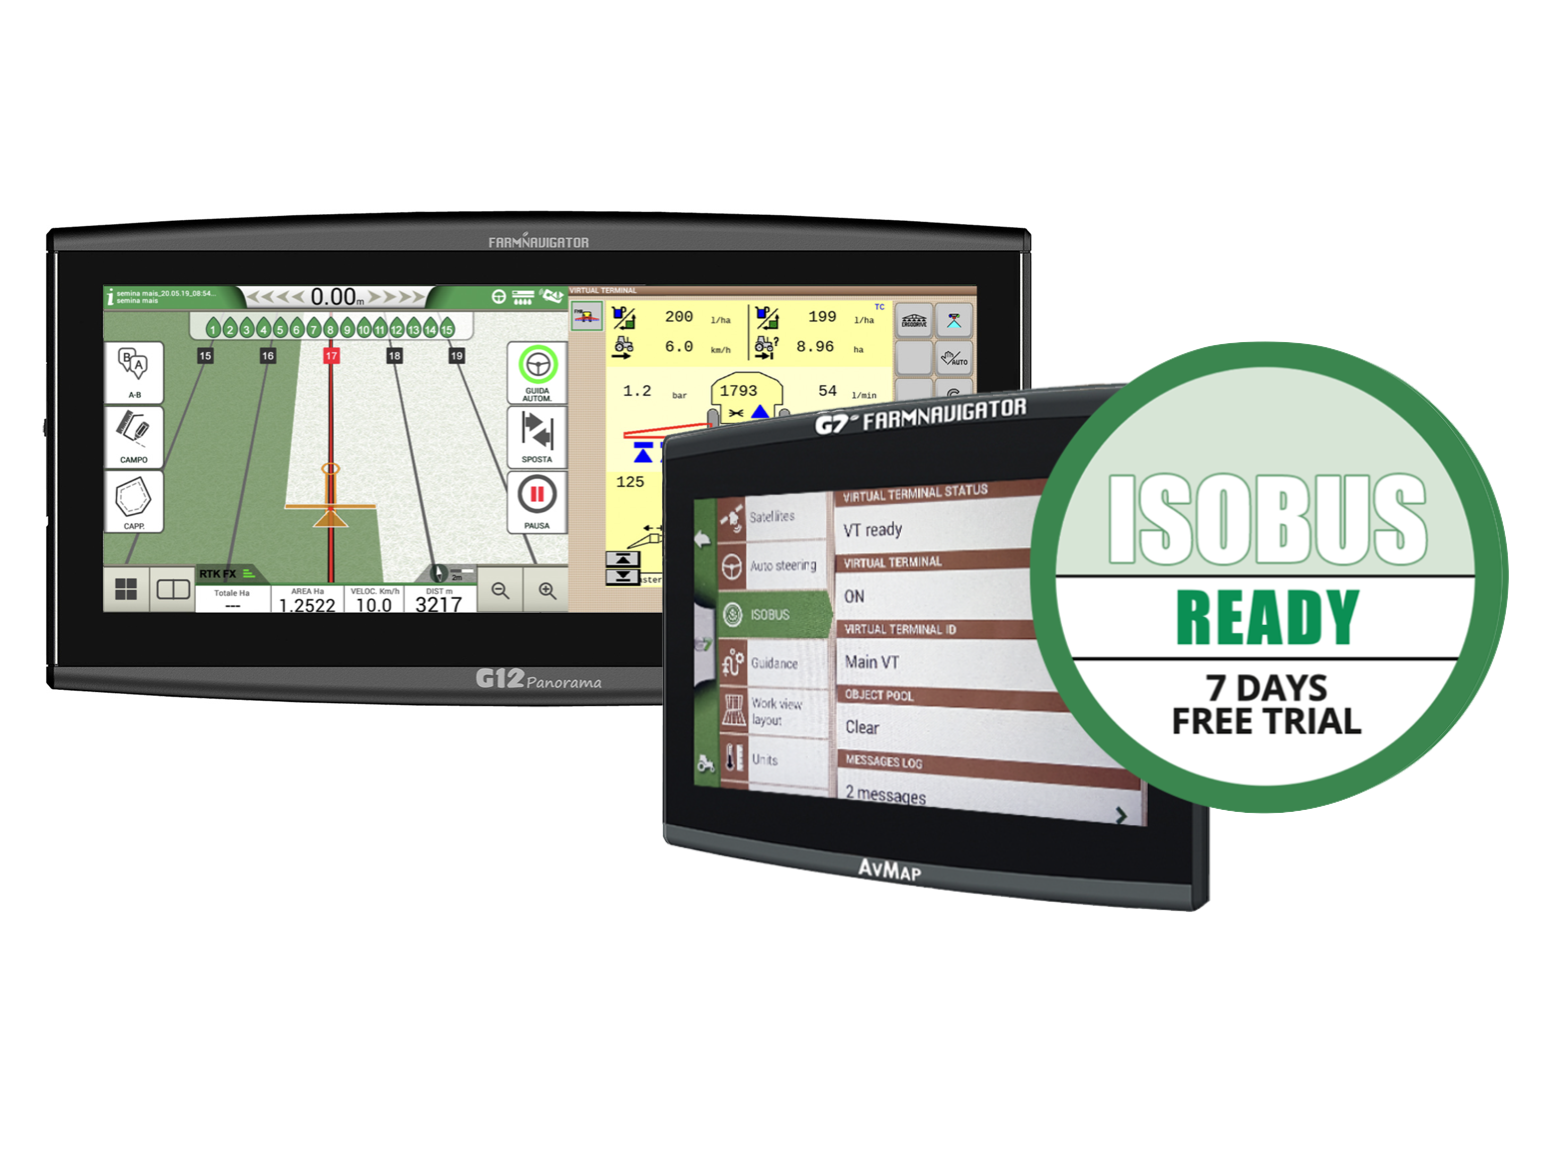
How to activate the FREE TRIAL
1. Place G7 on the ISO kit bracket
2. Connect the GNSS receiverin to the G7 Iso bracket , or directly into the G12
3. On the G7 / G12 select:
SETUP > ISOBUS > Start activation > Start trial
and confirm.
After the FREE TRIAL, you can purchase a VT / FULL lifetime license from your trusted FARMNAVIGATOR reseller. There are two ISOBUS lifeme licenses available: VT and Full (VT + TC).


divider
How to activate the lifetime license
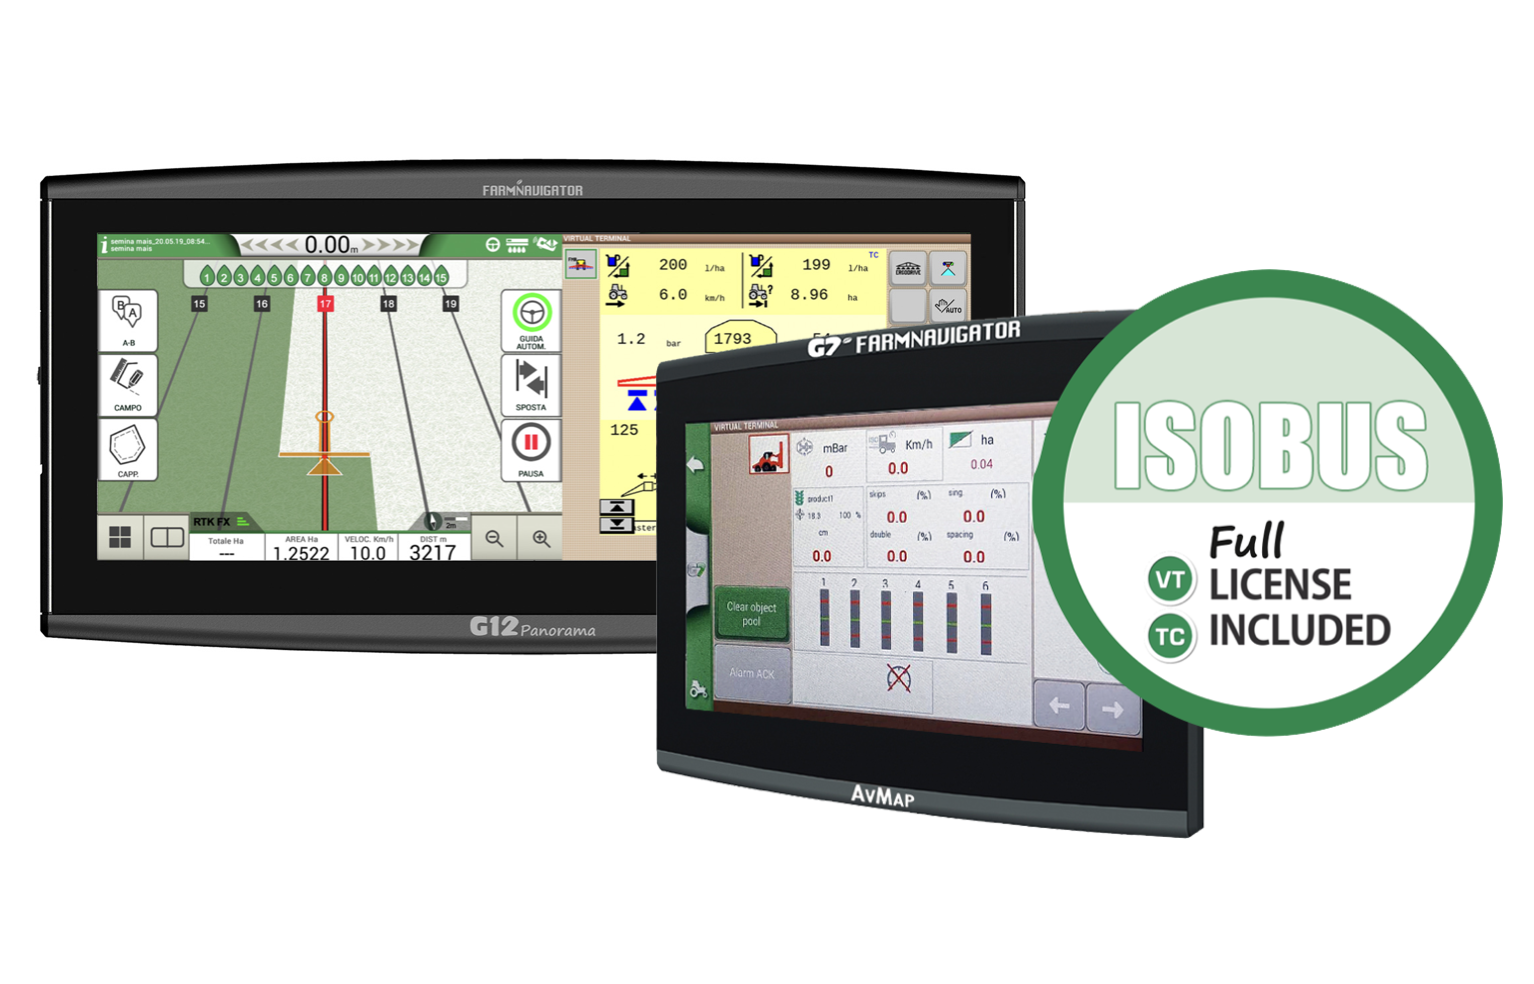
Convert your FARMNAVIGATOR
into a Virtual Terminal!
After the FREE TRIAL, you can purchase a VT / FULL (VT+TC) lifetime license from your trusted FARMNAVIGATOR reseller
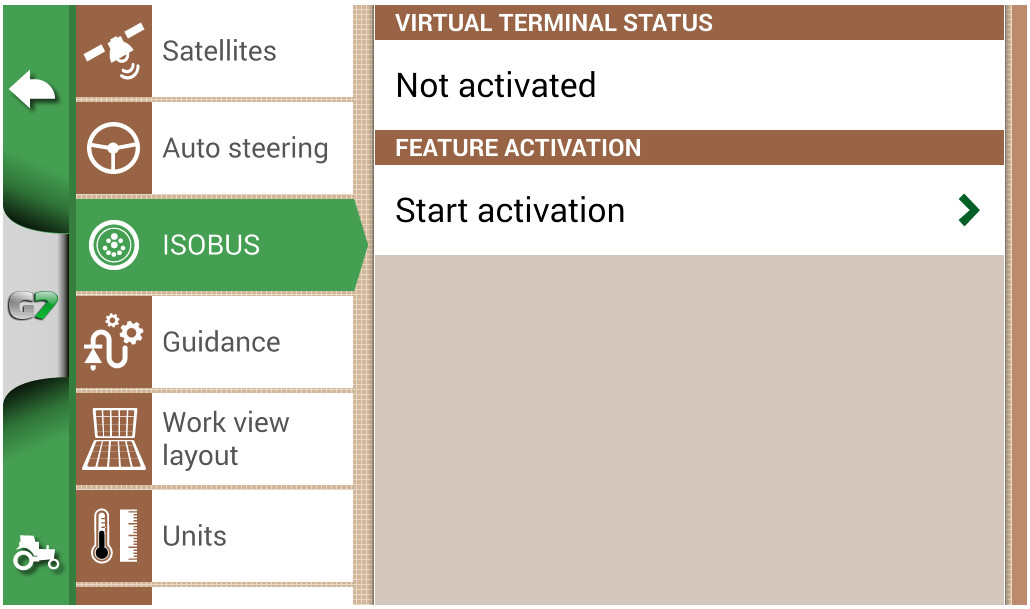
1. On the G7 / G12 select:
SETUP > ISOBUS > Start activation
2. The ACTIVATION page contains full instructions to activate the ISOBUS features such as the Virtual Terminal. Follow the instructions on the G7 / G12 display
3. Communicate the Device ID to the AvMap support specifying the type of license to activate (VT, TC or FULL) on it
4. Import activation license received from AvMap (steps 3,4,5 on the G7 / G12 display)
Read more detailed instructions below

How to import the License Activation
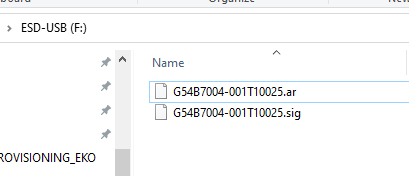
1. Get the activation license file from AvMap and place it in the root of SD card/USB key:
a. Open email received by AvMap and save on your PC the 2 files you find as attachments; files sent shall have same name and different extension;
b. Remove external support from G7 / G12, connect it to the PC and erase all files inside (it shall be empty);
|
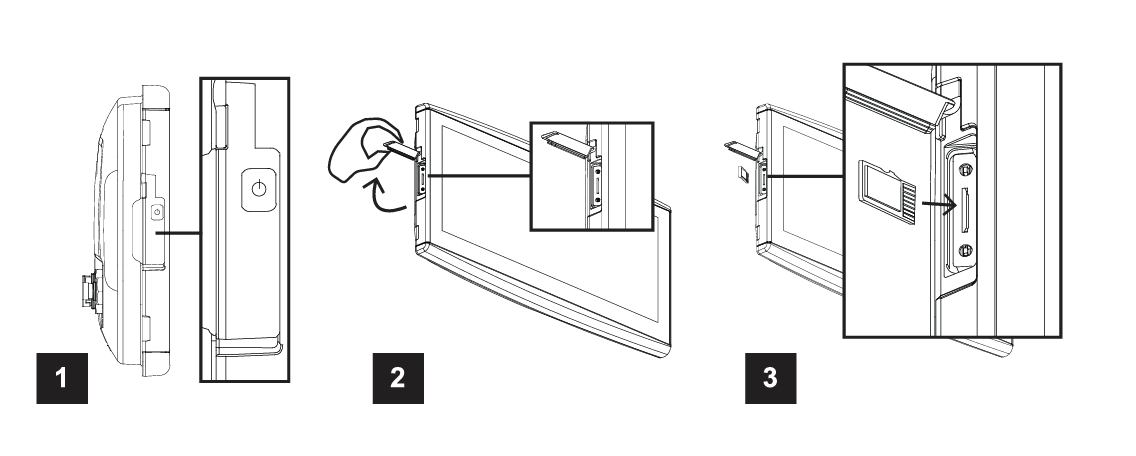
How to remove / insert the MicroSD: G7 series 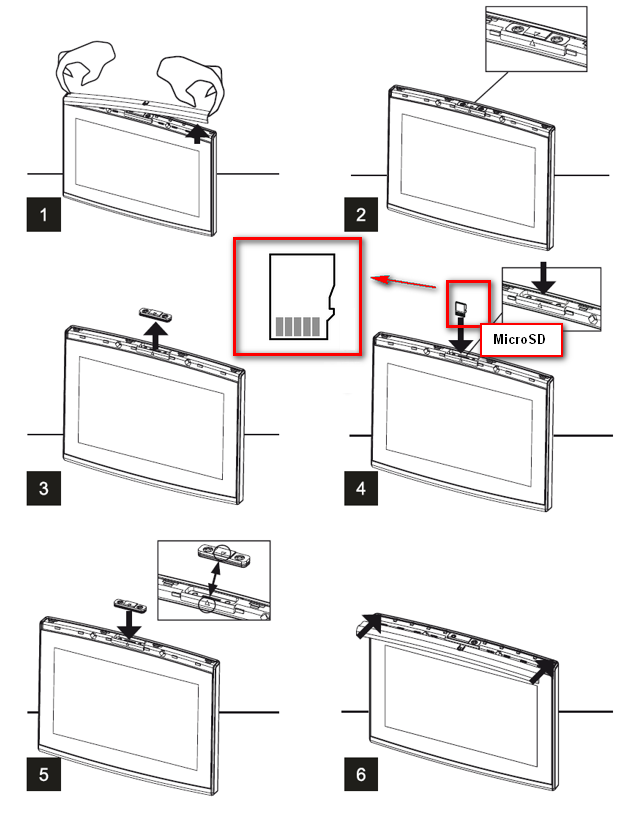 |
|
|
c. Copy and paste onto the external support the files with extension “.ar” and “.sig” previously copied on the PC;
 |
2. Plug USB Key or insert SD card and press “Import Activation license” button
d. Ensure that the external support is plugged or inserted into the G7 / G12;
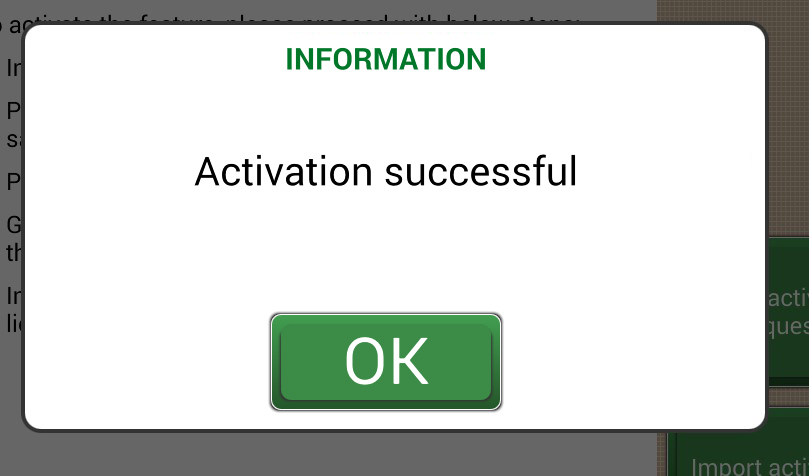
e. On “ACTIVATION” page tap on “Import activation license” and wait for the confirmation popup,
 |
f. Wait for the popup confirmation message and press OK to dismiss it;
Then, the menu shall update automatically, enabling ISOBUS features (Virtual Terminal).
 |
Customer Service through WhatsApp!
Open a direct one-to-one line with our Customer Support Center: